
|

.jpg.44da0172a400adb6811f03be15189781.jpg)
RIP-Felix
-
Posts
1540 -
Joined
-
Last visited
-
Days Won
33
Content Type
Profiles
Forums
Events
Downloads
Store
Articles
Everything posted by RIP-Felix
-
Cool! A direct reference to a game mentioned in the book (Not the same idea, but I like this). I wonder how it will turn out, but man this universe lends itself perfectly to VR. Actually that's why I'm not worried about egregious use of CGI in the movie. It's a world of VR, it's supposed to look computer generated because it is...no shocker there! I think this movie has a real shot at being one of my favorites! Oh man, that would be my favorite show. God I hope something like that happens. Please, PLEASE let a TV series be made from this book!!! Do it! I actually re-listened a week or two ago (Took me 3-4 days this time, instead of 2). Still a great story, although it didn't thrill like first read through. I also just finished Armada, his second book, last week. Not as thrilling, used many of the same figures of speech, references, and styles, but was a fun listen. It had all the 80s pop culture I expected after reading RP1. And hey, I made a "Raid The Arcade" playlist to get into it more, I can't say I wholly agree with his taste in 80s music, but it was fun none the less. Oh, if you read Armada, I recommend that you skip to the last chapter and listen to his playlist before reading the book, so you have those songs fresh in memory and can play them upon coming to them in the book. It makes the atmosphere more immersive/enjoyable.
-
Okay...having trouble figuring out how to get video snaps to work. I'm not sure where to put them. What I've gathered is they need to go into a snaps folder in the roms directory. Is that it? I read something about a needed xml or gameslist. I already have them scraped from emu movies for GameEX, so I don't want to go the Steven Selph's scraper method. This is mainly because I don't like his scraper has to be used without emulation station running and I can't choose them one by one, because it will probably make mistakes. Could someone point me in the right direction?
-
Well, I am using a 32GB SD, but the 26 PS1 games take the majority (15.7GB). I still have 11GB to work with, so the space for video previews is there. I want to add some more PS1 games and I still have MAME to think about. I will probably just do the Mame High score Games, after merging a set as you suggested with CMP. RetroAchievements needs a MAME high score feature. I hope they're working on it. It gets old fishing out the highscore screenshots out of mame, It would be great if it autopopulated on RetroAchievments.
-
Okay, so that video did clear up some questions I had about continuity. There will obviously be some MAJOR concessions made to allow a version of the story to be told. There were so many references, that to stay true to the book, you would spend all the revenue the movie generated to pay licensing fees. Looks like they will be making sweeping substitutes to at least one "key" scene for sure, but for the same reason they'll have to do the same in other scenes as well. I'm glad they released the trailer with so many eggs to find, because they're really helping me to manage expectations and get excited for the film (that battle clip where Kruger explode into coins and drops his legendary weapons is awesome! I think they did a great job portraying that). Knowing sweeping changes are coming will be beneficial, so I'm not anticipating a scene that may not happen. I can just enjoy the movies for what it is, not disappointed when a scene doesn't happen, but elated to see a great premise portrayed on film. It certainly looks like it will be packed full of references, overt and hidden, action, fantasy, with the right mix of plausibility and adventure that makes the book so great. I can''t wait to throw my money at a ticket.
-
That's intriguing, I'm currently only scraping boxart, but video clips would be way better! I wonder how much more space that would require? Thanks for the suggestion, keep'um coming! Actually I want to get kodi integrated. So that's on the list of things to tackle. It's kinda pointless if I don't figure a network attached storage repository for my media. Currently they're just sitting on a 4TB HDD in my HTPC. I was thinking of making a Raspberry Pi3 based NAS for this purpose. That way I can point all the computers on my network to that, and have access to my media collection without the need for huge HDDs elsewhere. However, I've been sidetracked by other, more enticing projects (NEStalgia). And work, of course.
-
As suggested... RetroAchievements!!! It's pretty easy to integrate and the video sums it up nicely. My RetroAchievments handle is RIPFelix if you want to look me up. Question, is there a way to link my RetroAchievements to my signature ribbon (Before I had the forum stop showing them I saw many users had something like this below each post)? I never looked into it. I'm running out of ideas for NEStalgia, which means I must be getting close to finished! Any more suggestions?
-
Nerdvana. I wonder if that precedent is what made emulation harder. Since console manufacturers had to create innovative (proprietary) technology to prevent knockoffs from under-cutting their business, the complexity consequently made emulation more difficult. Original X-box, for example, is too hard to duplicate and had too few exclusive titles to justify a determined emulation effort. Too much trouble for such a small number of people who would appreciate it.
-
Thanks, cool idea about retroachievments! I'll look into it. Which mame emu should I put the roms into, "mame-mame4all", "mame-libretro", or do you recommend a different emu?
-
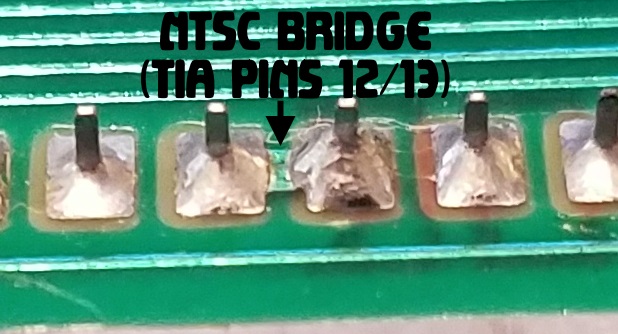
Actually neither did I before I began trying to fix my old consoles and mod stuff. I got a basic multimeter free from Harbor freight with the purchase of some random tool. I've just been using that. It doesn't even have a continuity buzzer, so I just use resistance to check continuity. That plus my $12 soldering iron from Radioshack makeup my ghetto electronics station. I don't even have a tube of Flux ATM! NO FLUX!!! Seriously though, I didn't really know what I was doing when I started this project. I learned as I went. Youtube, google, and patience. All I had coming in was comfort working with electronics. Actually, I did know not to start soldering components without checking the circuit schematics. That's why I didn't desolderer the NTSC bridge on TIA pins 12/13 before looking up the pinout diagram. It didn't look right to me, but I didn't want to assume. Turns out that was a good bit of restraint. I figured out a long time ago, you can't break it if it's already broke, unless it ain't broke to begin with. Either you'll fix it or you're back where you started. So why not have a crack at it? As for the Oscilloscope, well that's a necessary tool if you're really going to get into fixing old motherboards, especially Arcade games. They can help you locate bad roms, capacitors, diodes, check frequencies, it's the all around tool needed for more serious electronics tinkerers. However, they can be expensive. Since I have access to good ones at work, I went ahead and checked the boards out (Took maybe 15 mins). I rarely need to use a scope, usually a good cleaning is all that's necessary. In this case, I really wanted to get to the bottom of it. And an Oscilloscope turned out to be quite helpful. It would take a lot more reading and tinkering, but probably. Actually the 2600 is a remarkably simple circuit. I was pleasantly surprised how easy it was to understand, but it was mostly that service training video. I'm glad I found that.
-
I'm intrigued!
-
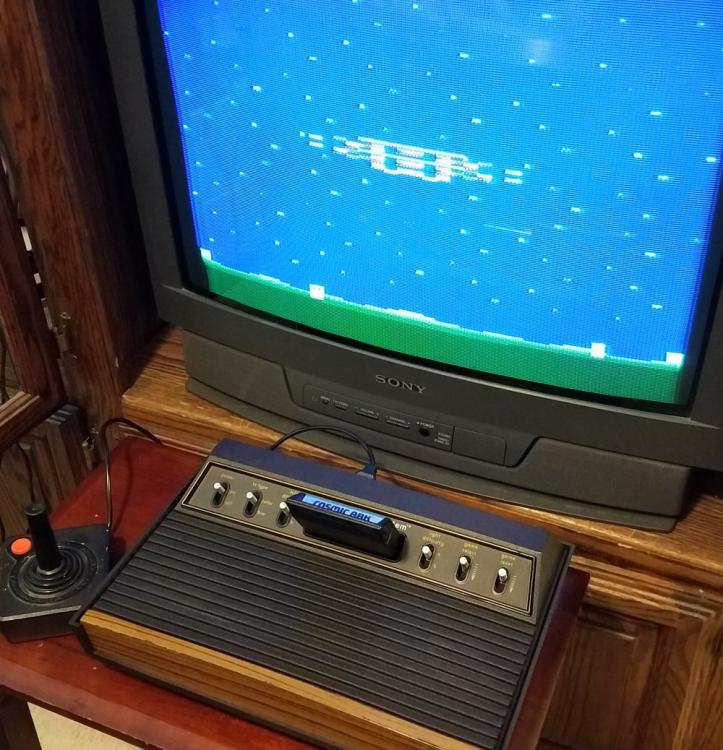
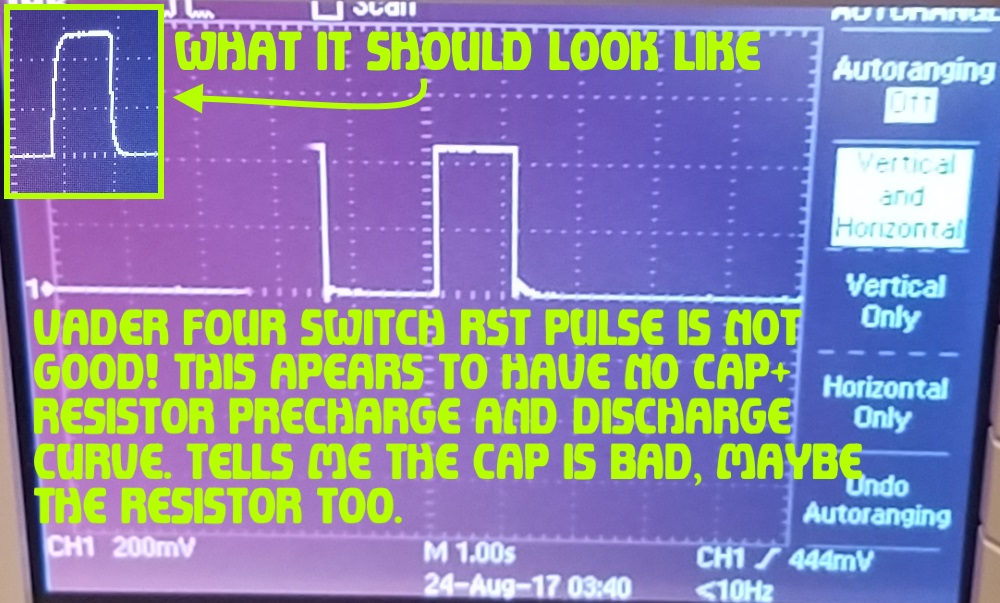
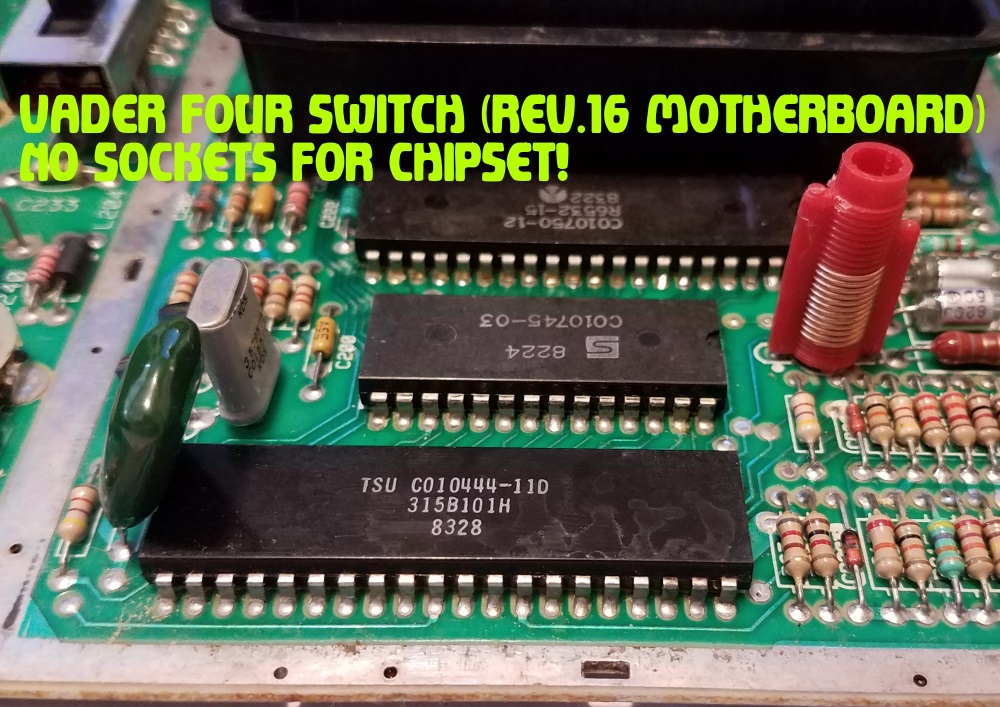
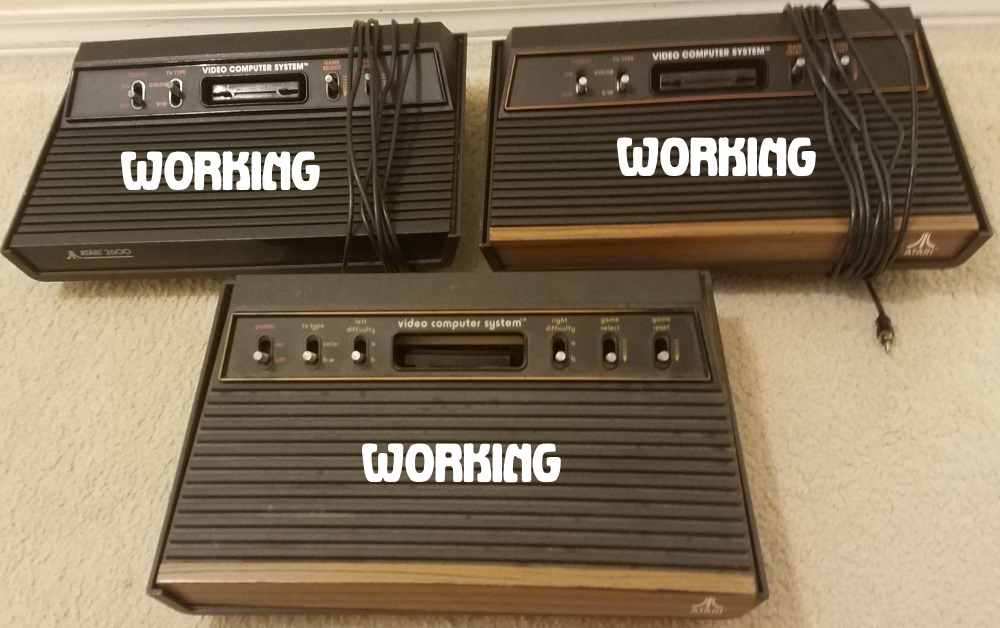
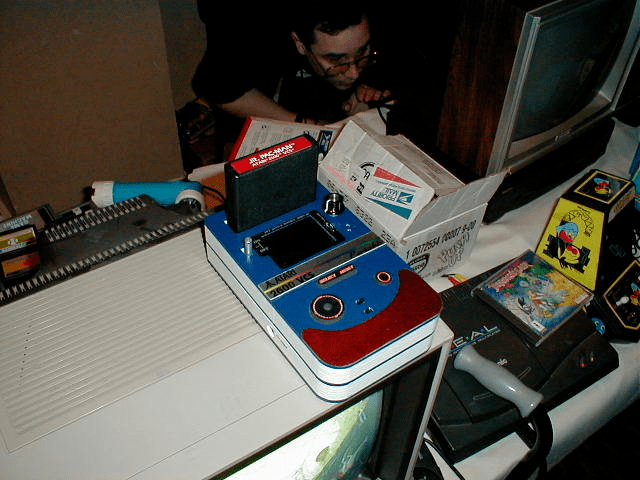
"Piminate"? Auto-correct gaff or is this a term used across the pond? Regardless, the one in front was the Heavy Sixer and I have no intention to modify it. Yes, she is a restoration project. She had a few screws loose and was slightly disassembled in that photo, because she was in the first stage of a loving restoration. To follow is the romance novel synopsis: This one looks by far the best. Not just aesthetically, but color depth and pixel accuracy. It's kinda neat to compare them with the same game one after another and see the distinct differences between them. Interesting. They all turn on and play. The oldest and coolest happens to be the best performer. From an untested console off e-bay, Nice! I may have to replace that voltage regulator at some point, since the shallowing voltage can cause problems, but that's an easy fix far down the road. While I already tested and verified the Woody four switch is working well, albeit with less color depth and pixel accuracy as the Heavy Sixer, the Vader didn't pass the tests. The vader was guarenteed to work or my money back, it does. It turns on and plays games, yes...but with flickering and RF interference. I figured some cleaning and knocking the rust off the RF cable port would clear the picture up, but it didn't. Here is what I think the reason is: I'll have to see if I can find the correct cap+resistor to replace and give it a try. It may be that simple. The lack of a reset pulse can cause all kinds of glitches, so it needs to be fixed. I noticed that the layout of the revision 16 Atari motherboard in the Vader is different than the 14 in my woody four switcher. First off the chipset is socketless and therefore not interchangeable without soldering. So they are more difficult to work on: While I was checking out the comparative anatomy of my Atari's I took note of pins 12/13 for the NTSC bridge on the Vader four switcher to see what they looked like and confirm their existance: Good thing I didn't waste my time trying to desolder it.
-
Problem Solved! It's always the little things! Today my replacement atari's came in the mail. Yes plural. I got a Vader four switch in case I couldn't salvage mine and it was guaranteed to work or my money back. I later saw a sunnyvale heavy sixer on ebay (Untested) for cheap. I figured between the three at least 1 would be working and maybe I could salvage parts to get another working. The busted one I could use as an HTPC case or Raspberry Pi build. The vader four switcher even came with a complementary Coaxal to RCA adapter, how nice of them. Turns out, however, something unexpected happened when I plugged them in (After checking the voltage on the "new" power supply of course). All three are working! Turns out, it was that RCA adapter all along. Since I didn't have another one to use, I was chasing gremlins the whole time. Well, I was starting to suspect this. I knew from the electronics tests I performed that the game was running and should be sending video out if there was nothing wrong with the TIA chip (Which required a working replacement to test) or RCA cable (Which I fixed). So now I have 3 working Atari 2600s. I really like the Sunnyvale Heavy Sixer. It's in real good shape! After a little cleanup and dielectric grease, it will be my flagship 2600 (Display console). The wood-grain four switcher I will swap innards with the Vader black, because my originals player 1 difficulty switch broke off in the A position and I want the wood-grains to be in perfect shape. I'll probably keep both of these. I might sell the Vader, it's a good everyday use model, the one you let kids beat up on since it's not mint anyway (the case is in good shape, it's just that difficulty switch). Anecdotally, the console with the best picture (Least RF interference on screen) is the one I cleaned and thoroughly tested. The pixels actually look really good on my CRT. This is obviously the way this was meant to be played. Emulation is neat, but the real thing is...well...the real thing. I need to clean the other 2 now and reassemble them such that the Vader has all the flaws. The faceplate on my original is scratched. The vader's is pristine, so I'll swap those. I'm going to reseat all the chips just to make sure their connection is fresh. While I'm in there, I'll go ahead and check the voltages, using an oscilloscope to make sure the reset pulse and clock are in spec. It shouldn't take more than five minuets now that I know what I'm doing. These are indeed built like tanks! It's been a pleasure working on them. Its fun to learn the electronics and get them working again, even if there was nothing wrong with them in the first place...lol.

-
-
Truly! I just snapped a few pics myself and took it in as long as I could. My sister got the video, but she was only glancing down every now and again to get the eclipse back in frame. That's why the video drifts down. Between the two of us, we got some good photo/video to remember, without it intruding in on the spectacle. But yes, I reminded myself to take it in with my eyes, especially once I realized it was way different than I expected. Fastest 2 mins of my life!
-
Spiffing Things up! - System Bezels and Run Command Themes Run command Splash screen: There is one error in the tutorial. The "launch menu art" option needs to be disabled or your scraped art will show instead of the system splash. Run Command System Splash Artwork Download Page Use filezilla or whatever to drop the system files into "/opt/retropie/configs". Each system folder just contains a "launching.png" file, so It will simply merge this into your existing system folders or copy them if it's not already there. Now system specific launching splash screens will display instead of that horrid little box! System Bezels: System Bezel Download page. Here is the dev page where the DL link was, in case it breaks. Using filezilla or whatever copy the "borders" file into "/opt/retropie/configs/all/retroarch/overlay". Go to retropi and restart emulation station Start a game in any system. Enjoy your custom Run command launching splash screen you installed earlier! Pres Hotkey+X --> Settings --> Onscreen Display --> Onscreen Overlay: Change "Hide Overlay in Menu" to off so you can see the bezels. Choose "Overlay Preset" and "borders" to select the system bezel to use. Note that the NTSC NES is "Nintendo.cfg" and SNES is "Super-Nintendo.cfg" These weren't really named well. Under NES and SNES there are just famicom and super famicom bezels. If that's what you want, great. If not, that's how to find what you're looking for. There are alternates too. Choose the one you like best. Still on the "Onscreen overlay" screen, set the "Overlay Opacity" to 1.00 and go back one page to "Onscreen Display" Choose "Onscreen Notifications" and increase the "Onscreen Notification X position" to 0.150 so notifications don't get cut off by the completely opaque bezel. Go back to Settings --> Video: Change Aspect ratio to 4:3. I recommend doing this to keep NTSC formatted pixels looking the way they're meant to on a CRT. It also fits best within the bezels. You could choose "custom" and adjust the X and Y position to fit as you like within the bezel, but I prefer choosing 4:3 so that ratio is maintained. It may just be me, but it seems to minimize input lag in game. Go back to Main Menu --> Quick Menu --> Shaders --> Load Shader Preset: You can apply a CRT filter from the list of shades to add scan-lines and get that retro look. I like it, but it really feels like it adds input lag. IDK, maybe it's just me. To revert back to stock go down to "Shader #0" and choose "stock.cfg". Hit Apply Changes at the top. Once everything is setup as you like it, go back to Quick Menu --> Save Core Overrides: This saves all the changes to the entire system, making the changes to all the games in that system. If you just want the settings to apply to this game, choose "Save Game Overrides". That can be useful for the controls section, if you just want to change controls to a more comfortable configuration for just one game, but not have it apply to all of them. Press Hotkey + X to exit bcak to the game and enjoy the system. You'll have to do the above for each system. Happy hunting!
-
I like keeping most of my game lists between 30 - 100 for ease of navigation. I look up top 100 lists of games for ideas of ones I 'd like to try and also grab my old favorites. This makes scraping and finding the game I want to play easier. I haven't even attempted MAME yet......it scares me. Unless I import the entire romset won't it have issues with parent roms and such. I just don't even want to think about tackling that can of worms yet. So far, I'm sticking with the 8-32bit console era for NEStalgia.
-
Well, you'll get a chance again in 2024. Wapakaneta in 7 years my friend! 3:56s of glorious totality. Or Cleveland (3:51s) and go see a cavs game (If they can keep the playoff runs coming for the next 7 years). I have family in Rockbridge and may decide to travel out east for that one (If we go that route, maybe I'll look you up). Not sure yet. There some sights I'd like to see out east. Alternatively, I was thinking of a Mazatlan vacation. Of the two destinations, Mazatlan (4:20s of totality) would have the better chance for clear skies and we have friends that like Mazatlan, so maybe we can split the cost and go together. IDK, what Ohio's weather like in April? I couldn't justify the vacation just for the solar eclipse, but it doesn't just have to be about the eclipse, that's just the excuse that sweetens the deal!
-
Did you have clouds, clear sky, smoke? We lucked out with perfectly clear blue sky. Thank god we didn't have to travel. Our local thoroughfares were jammed up too.
-
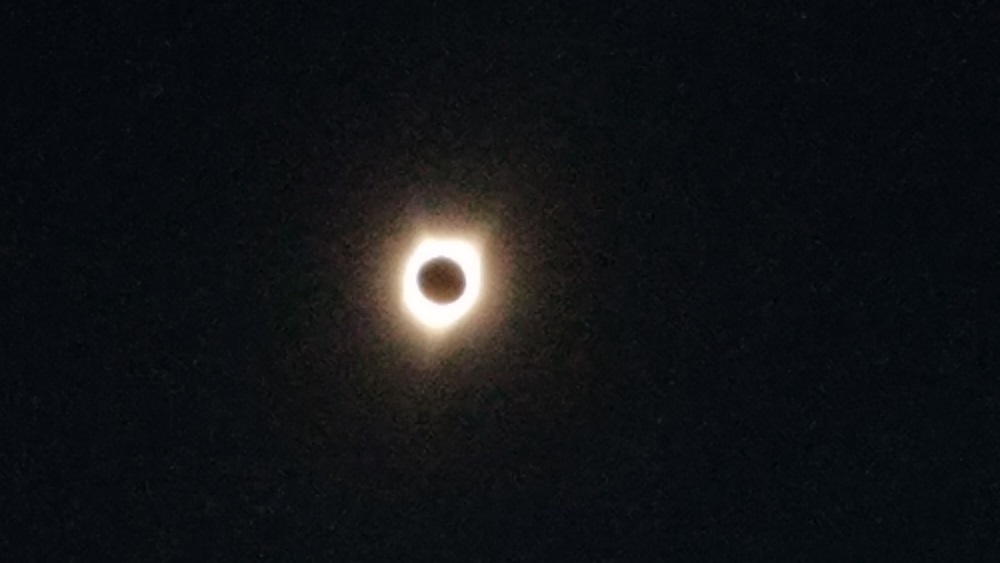
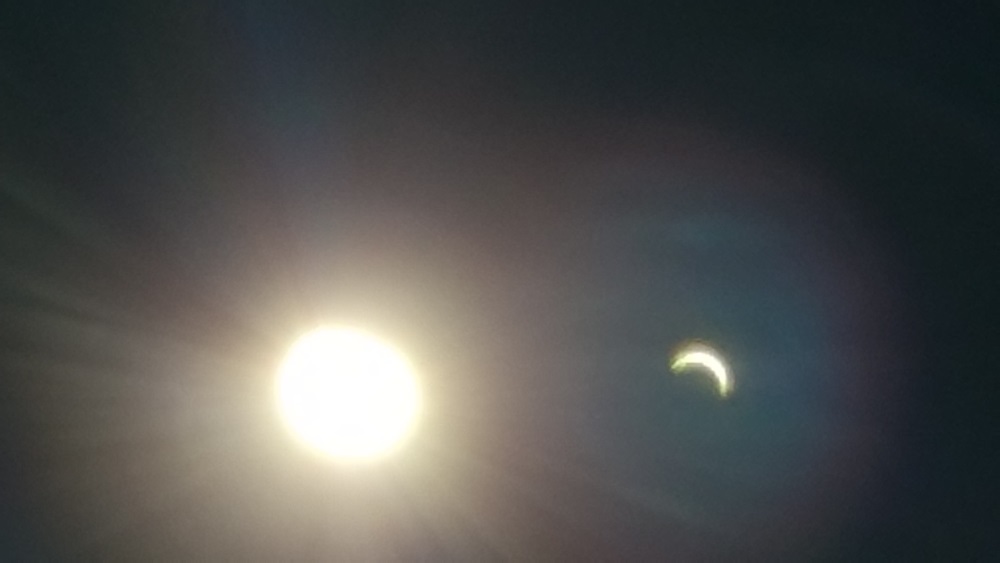
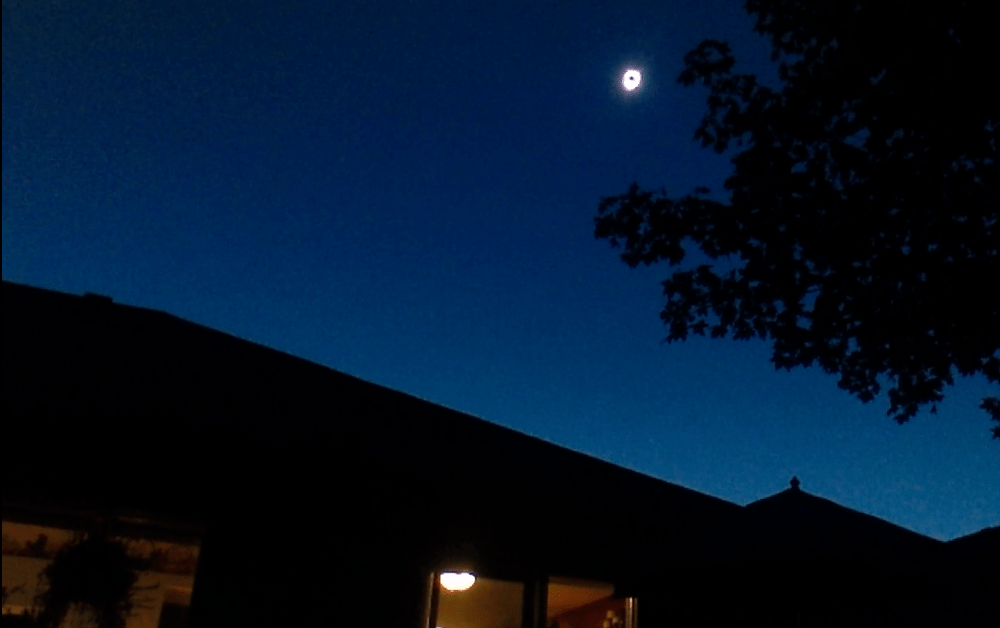
WOW!!! I didn't expect to be moved as much as I was by this. My heart rate increased and felt that childish sense of wonder that fades as you age! Totality or bust, seriously IT'S NOT THE SAME. I took the opportunity to do some real science. The Temperature dropped exactly 4.0 degrees Fahrenheit. We experienced 1:46s of totality, 1:59s from diamond ring to diamond ring. Something I wasn't expecting was right at the edge of the diamond ring I saw flashes of light that buffeted like lens flare in Star Trek. These may have been Baily's beads, but it occurred exactly 45 seconds before totality and just for about 10 seconds, 35 seconds before the first diamond ring. The light was too bright for my eyes to focus on, but I distinctly saw blue/white flashes! Baily's beads occur because of light passing around surface features on the moon, and where there is just a sliver of the sun visible. The pictures and video I've seen of them look different, but to the naked eye (without filters) maybe they look like flashes. I'm not sure that is what I saw, but it was absolutely unexpected and awe inspiring. All the video I've seen doesn't compare to seeing it with my own eyes. The bluish white corona pulsating, the dark blue twilight sky around it, Venus clearly visible nearby, lighter blue sky on the horizon, the size of it with your own eyes is larger that it appears in photos and videos, and of course the emotional response I couldn't help. The whole neighborhood erupted in cheers and fireworks during totality. It was indescribably AMAZING!!!!! I feel blessed to have seen this in my own back yard (and to still have my eyesight...lol). Pictures! And now for the the money shot! VIDEO! Sorry, I don't want to create a YouTube account, so I had to use handbrake to get the clip under 26MB. Lost some fidelity, but it's pretty good.

-
Yep, I saw that too, but it didn't seem to work. So put a copy into BIOS and ROMS. The one in roms works because it's the default location. Since I converted all my PSX games to PBP files I was able to remove .bin and .BIN from "es_systems.cfg" for PSX. This is done by default, so I you start with PBP files you wont have to do anything. Just put the bios into the psx/roms folder and forget about it. I'll edit my earlier post to reflect this change. I now want to get myself a PSP, or better, a Vita if it will work. I wanted to go all out and get them looking spiffy, before converting. However, for the sake of time and because I wanted to get these on the pi and move on to other things, I just added the Boxart and left it at that. Emulation station doesn't care anyway.
-
...Yawn...Okay, I'm refreshed and ready to get back at it! PS1 Setup - Managing Multi-Disc Games Converting ISO/IMG/BIN&CUE to PBP: There are a number of advantages. PBP are compressed somewhat and may reduce the size of the games without much increase to load times in retroarch. They combine multi-disk games into 1 file and thus 1 entry in emulation station. You can port them to a PSP with custom fimware. Lastly, they load all the multi-disk games into the emulator so you can swap disks in game, without needing to exit back to emulation station. Given these advantages I decided to go this route. The process goes like this: Obtain PSX2PSP and the required "BASE.pbp" (Place into "PSX2PSPv1.4.2\Files"). Run PSX2PSP.exe and choose your preferred theme. I like the classic mode instead of themed mode, but it doesn't matter. Click on the "options" button. Double check that "when extracting iso, save toc as: CCD" is checked. Click on the "Folder" options tab. In the "Auto create folder on convert" choose "create main game title folder". This will put the EBOOT.PBP into a folder of the same name as the game instead of the Game ID, which makes it hard to know which game is which. Save and go back to main menu. In the "ISO/PBP" drop down select file 1 and press the [...] box to select the first disc IMG/ISO/BIN. The rest of the boxes quite nicely auto fill with the correct information (Game ID, display name, and etc.) That's a nice feature! Use the "ISO/PBP" drop down to select file 2 and do the above for the remaining game discs. Select images as desired. I just pointed the "icon" image at boxart for the game. You can preview the image and display name. This is how the game entry would appear on a PSP, which is nice. If and when I ever get a psp I'll have these done. Press convert! It will fail if you didn't put "BASE.pbp" into "PSX2PSPv1.4.2\Files". In the output folder will be the file "EBOOT.PBP". If you're going to port this over to a PSP, you need to keep it in this format, but since I'm putting it on NEStalgia I just need to rename the file to match the game so emulation station can easily scrape artwork for it. "Metal Gear Solid (USA).PBP", for example, will work fine. FTP your newly minted PBPs into "/home/pi/RetroPie/roms/psx", restart emulation station, scrape artwork, press F4 to exit ES and save the metadata XML, type "emulation station" into the terminal to get back to ES, and start a multi-Disk game. Enjoy! To change a disc: Press Hotkey+X (Brings up retroarch menu) --> Quick Menu --> Disk Control --> Disc cycle tray status to "open tray" (you'll see a text dialog confirm the command) --> Disk index (Change to disc number desired) --> Disc cycle tray status again to "close tray" --> Hotkey + X. If you were on the change disk prompt page it will automatically continue. If not, Press Hotkey + B to reset. This will reset the emulator on the disk you chose. This is useful if you want to continue a save, say from disc 3, and don't want to wait for the prompt appear - since Disc 1 is always loaded first when launching from emulation station. Just wait for the game to load, go into retroarch menu, change to your disc, reset, and continue from your last save. I love this sooo much!!! You can get some compression out of the process. I got 25-40% compression from most of my games in ISO/BIN/IMG format! This means I can fit more on my precious little 32GB microSD card. This was a welcome surprise! I converted all my games, multi-disc or not, to pbp for this reason. It's kinda hit or miss, however. Some games don't compress, other do. I went from 24.6 GB down to 19.9GB. That's not too shabby (~20% smaller)!
-
What they mean is a coast to coast eclipse (US selfish eclipse. You know...God winking at the good ole USA and all that blasphemous patriotic sentiment). Yeah, you should be able to drive north a bit in 2024 to experience totality. Lucky for me, this one is right over our house! We'll get 1:46s of totality. I could drive north and get 7 seconds more, but I'm not braving the roads with millions of tourists crowding the road. I'll sacrifice those precious seconds for the convenience of staying home!
-
You mean this? Looks like a hulker, but hey, if it works who cares.
-
Software continued... Here is the Theme I'm using (NES_Mini) and how to install it: I ran into a few software hickups, retro pi is pretty user friendly on first boot, but has it's quarks like anything else. My artwork was not staying put after I scraped it. After a reboot it would be erased and not save...grrr, It takes a long time to hand pick them, which is the better option if you don't want it scraping incorrectly! Obviously after doing this a few times, I got earked pretty good. So the solution was delete the "gamelist.xml" in the offending systems (some would save others would not), re-scrape everything, then press F4 to exit emulation station. This saves the XML. Then I could just type "emulationstation" in to get back to ES from the terminal (Linux, yuck). After reboot, all is well! Whew. The retropi image is PAL oriented, meaning we Americans, having grown up with Turbo Grafx instead of PC engine and Genesis instead of Megadrive, have to make some changes to get things looking right. Here's how to get the Genesis logo, name, and images to appear instead. Using Filezilla or another FTP program to gain access to the Retropi filesystem, navigate to "/etc/emulationstation" and copy "es_systems.cfg" to your computer. Edit it in notepad++ (Better than Notepad for pi code because it shows the code on lines instead of wrapped). Navigate down to the Megadrive System and change it as follows: <system> <name>genesis</name> <fullname>Sega Genesis</fullname> <path>/home/pi/RetroPie/roms/megadrive</path> <extension>.7z .smd .bin .gen .md .sg .zip .7Z .SMD .BIN .GEN .MD .SG .ZIP</extension> <command>/opt/retropie/supplementary/runcommand/runcommand.sh 0 _SYS_ megadrive %ROM%</command> <platform>genesis</platform> <theme>genesis</theme> </system> I took this opportunity to navigate to the PSX system and add .bin and .BIN to the extension list so those filetyps will be recognized. ***EDIT*** Don't do this. Instead convert to PBP with PSX2PBP as detailed in the next post. If you do, you wont have to touch the PSX entry in the above file". It solves this problem in a much better way. The following is left for posterity. It shows the process I went through to figure that out.***EDIT***This was another problem I noticed and it was nice to kill two birds with this one file. I had problems getting the modified config file to FTP into the right folder. It kept failing to transfer. Eventually I got it into "/opt/retropie/configs/all/emulationstation". I restarted ES and it worked for me after that. I'm currently trying to figure out where to put my PS1 Bios to get PSX working, it freezes otherwise. That's where I'm currently at... ***EDIT*** Apparently, the PSX bios must be in the Roms folder. They say, it should go in the BIOS folder, but PCSX doesn't see it there. It only sees if if it's in same folder with the game being loaded. That's where Cue files come in. I never used to know what these were until recently, my bins worked fine on their own, so no need for the clutter I thought. But apparently they launch the game and point to audio tracks. Most games don't have separate audio tracks, so they don't do anything but launch the game, but the ones that do (wipeout for example) wont play an audio track when you get to the part of the game where is supposed to play. The cue file points to where they are in the image and the game will function as intended. They can thus improve the game. In retropi, *.bin is not seen by default anymore because they want you to keep cue/bin together and only want to display 1 entry. So above where I added it back was actually a not the proper way. I found this which has a good explanation of getting PS1 games running well, explained the CUS/BIN situation, and linked to a CUE library where I could get them back (I deleted them long ago). I'm still trying to figure out how to use *.m3u playlists for multi disc games, or better yet convert them to EBOOT *pbp with PSX2PSP, and how to change disks in game. I ran out of time, it's time to get some ZZZs...
-
Just came across these: Gex (Original was side scroll platform) Heart of darkness Pandemonium 1 and 2 Punky Skunk Spider: The Video Game I forgot that Gex 1 was 2D...lol, I remember being disappointed it wasn't 3D. Heart of Darkness looks good for a 2D and gets touted as a forgotten jewel. Might be worth a play?
.jpg.44da0172a400adb6811f03be15189781.thumb.jpg.4316d89cc7dd35bcdf11c619d81a9d25.jpg)


