About This File
Converts image files to simple Gif or animated png (apng) animations.
I built this to be able to quickly add set subtle animation styles to PinballX wheel and logo images, but it should work for any image you want to throw at it if you just want to animate a button or something (don't try it with 4k images though!).
The app has two variations of animations, a sweeping left to right overlay/merge (stripe, cloud, stars or check patterns) and a colour flash/incremental change.
Install
No installer as such, just download the file and extract the contents to a folder somewhere and then run ImageToGif.exe
Using the Application
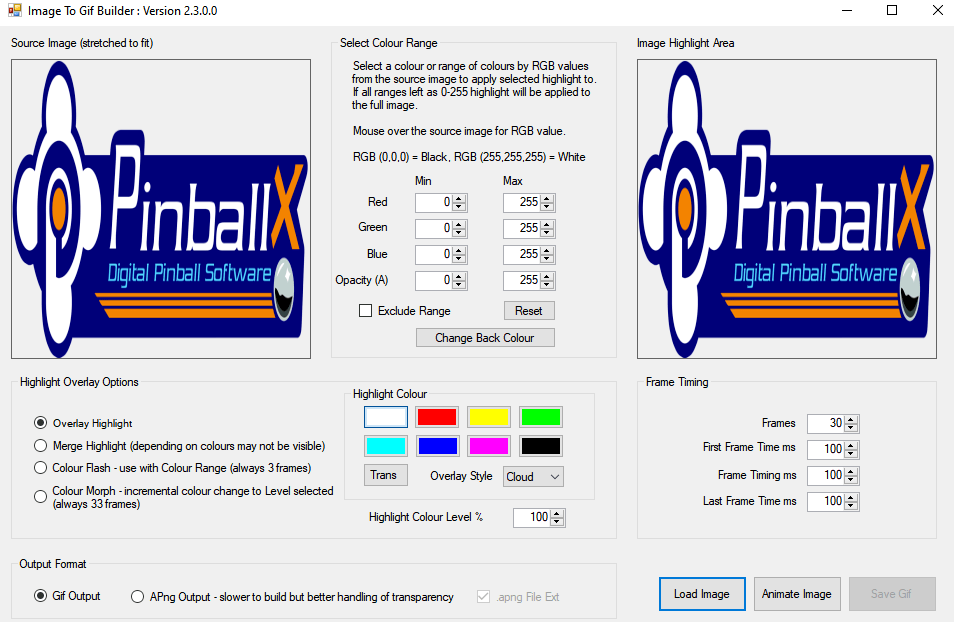
Source Image - Shows the image file you currently have selected. By default on load this is a PinballX logo.
Select Colour Range - Here you can select what colour range from the source image any animation is applied to. The Exclude option inverts the selection to use anything outside the set range.
Image Highlight / Preview Area - This image will show the areas of an image where animation effects will be applied to, or after animating an image to show a preview of the Gif created.
Highlight Overlay Options - This is where you select the effect you want, its colour and at what level. Overlay and Merge Highlights are similar as they both produce a sweeping animation left to right, the Flash animation is simply to flash a different colour for a single frame with morph incrementing steps to and from that colour.
Gif Output Options - Change the timing of your animation as you want.
Buttons - Self explanatory
Settings are saved / restored on app close / startup.
Examples
Overlay - Changing to these settings will produce;
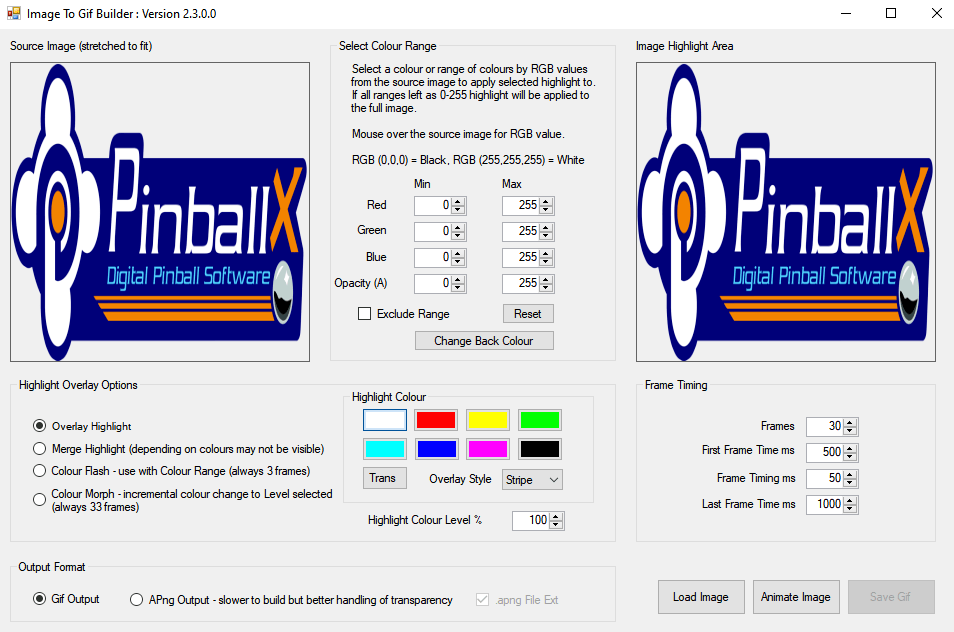
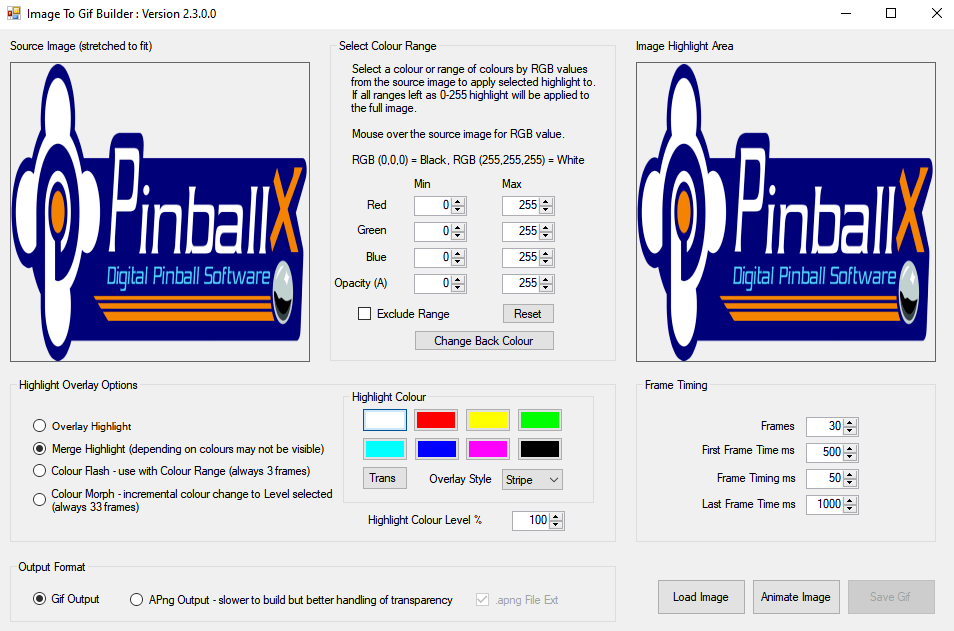
Merge - Changing highlight type to Merge;
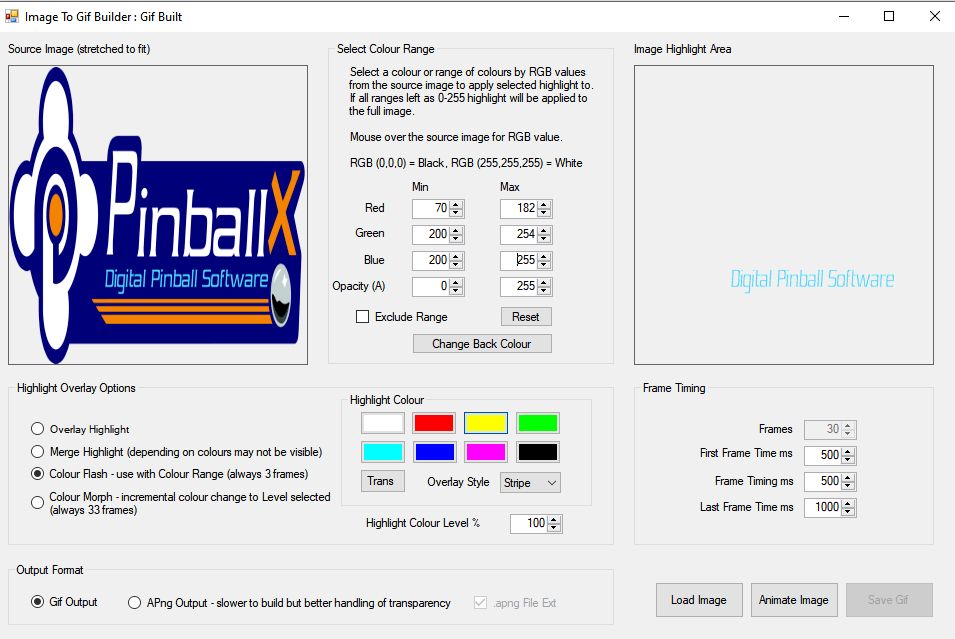
Colour Flash - Selecting a RGB range will limit the area of the image used for the animation, here we set the RGB range to match the turquoise are of the image, and set the highlight colour to Cyan as a colour to replace it in a single frame flash. Note the preview area reflects the selected RGB range.
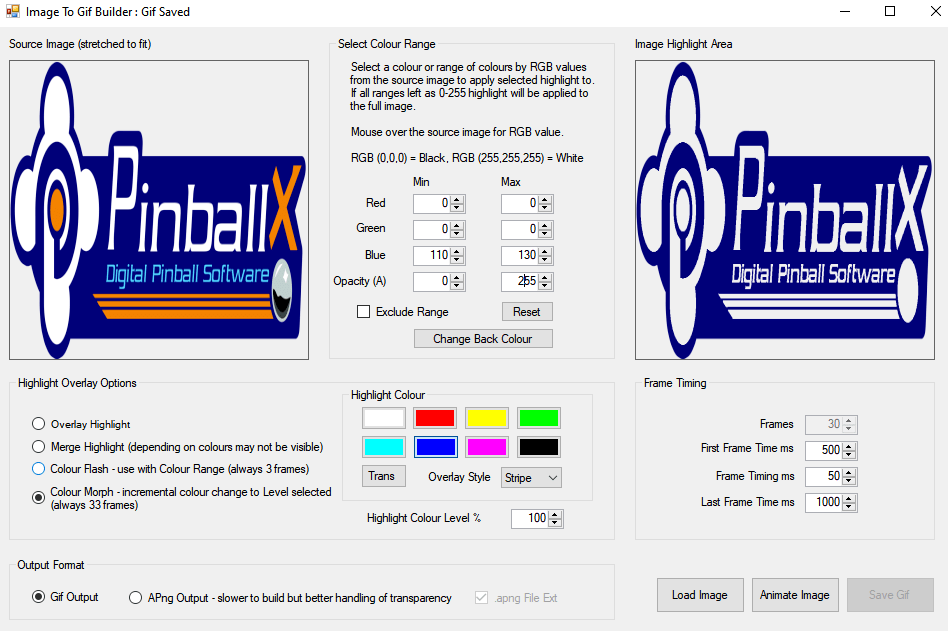
Colour Morph - To change the dark blue area of the image to more of a navy blue in steps, set the RGB values to reflect that area and select morph to incrementally change colour (rather than flash which is just one frame);
Alternate Overlays
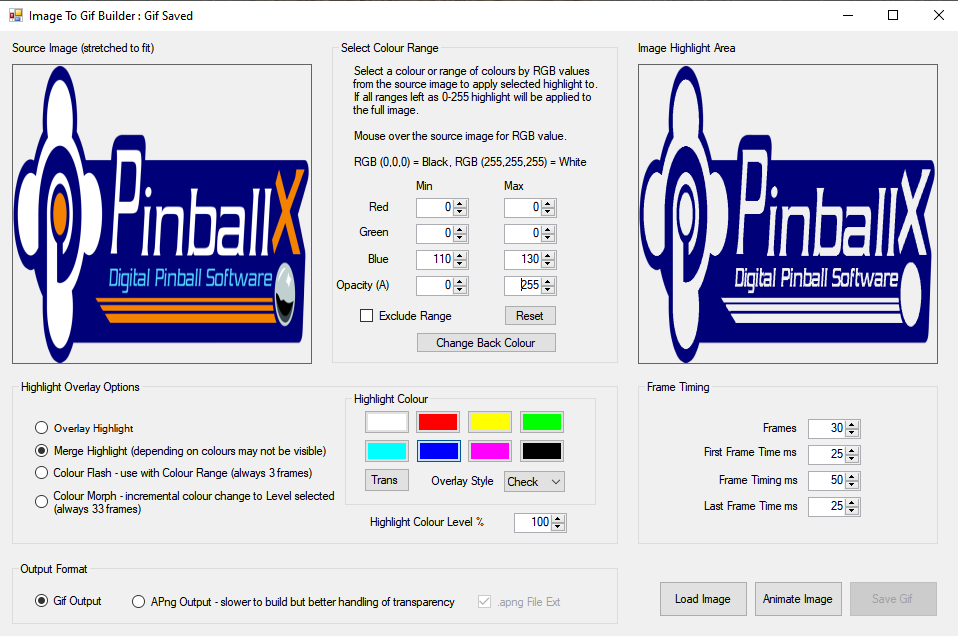
Four types of overlays (used in the Overlay and Merge Highlight options are included with the app, Stripe (as above), Cloud, Check pattern and Stars (or snow, or just noise, call it what you want)
E.g. Check Pattern selected;
Advanced Use
Overlays - The overlays used by the app can be found in the resources folder. These can be amended to alternatives if required.
Photoshop PSD Files - The app can open .psd files and apply an effect to a single layer before building the output. This makes selection of areas to animate in the flattened image easier and can be combined with RGB values as well. See support thread for a bit more info / example. This option can be used by media creators, or if you have access to source psd files. Note some images may have issues with transparency if the psd file was created with Paint.net rather than gimp or photoshop.
Transparent Colour option - For Flash and Morph options the app has the option to change transparency of the input image (or areas of it) in an animation for apng output. Select the Trans option instead of colour highlight. This can fade an area of an image (or a psd layer) partially or fully (depending on highlight level selected)
General Usage Tips
- Apng format handles partial transparency, gifs don't. Use apng as output format for any image where partial transparency is used on edges.
- For PinballX wheel images using apng format output use the .apng extension option. For other uses .png should be ok.
- Building and previewing Gifs is quicker than building Apngs. Tweak and adjust settings where possible using Gif as the output format and then switch to Apng format for the final version where apng use is wanted.
- Lowering frame numbers will result in smaller output file sizes and quicker processing, but animations may not be as smooth.
- PSD files will be slowest to process input format. Use low frame count and gif as output while checking settings, selecting All Layers will be quicker than individual layers.
- Output file sizes can be reduced greatly via online compression/optimisation tools, e.g. https://tinypng.com/ for png/apng . Note that some tools are 'lossy' so check the results.
Command Line / Batch
The app does have a bulk option where it will process all images in a folder and output gifs to the same folder using the same file name. Options are limited as i don't expect it to be used much (as settings normally need changing for each image).
Two parameters (All other processing options for the gifs are as set in the app config [as saved when last closed]);
-I="path" - the folder of input images to process (no trailing \)
-O=1 - overwrite existing gifs when set (0 to not overwrite, but that is default behaviour so not needed)
Example cmd line - imagetogif -I="C:\Pinballx\Media\System Logos" -O=1
PSD files are excluded from command line processing
Issues
Please report any issues here, attaching the log.txt and config.ini files from the apps folder;
Other Notes
The application uses PixelMap, Magick.Net and apngasm, dependencies are included with the app.
.Net 4.5 is needed for app to run.
and thanks to @Mike_da_Spike for doing a few tests for me.
What's New in Version 1.1.0 See changelog
Released
Added different options for semi transparent pixels in source images (e.g. where a border fades out) as these are not supported in gifs. These can be handled like in V1, removed, or replaced with a mixture of opaque and transparent pixels .


